This article shares how to make a colorful headboard using a sheet of plywood and a bit of imagination.
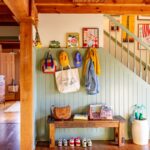
When it came to designing my son’s bedroom, my main goals were simple: make it colorful and keep the costs low. I was hoping to find a unique headboard at an antique shop, but with his room’s sloped ceilings, I couldn’t find anything that would fit.
After considering a few options, my husband had a brilliant idea: we could make one ourselves using a spare piece of plywood we already had.
It was the perfect solution—we could customize it to any size or color we wanted, all while staying within our budget.
So! I’m excited to share the (very easy) tutorial with you today. This DIY headboard project is quick, easy, and completely customizable, from the shape to the color.
Supplies You’ll Need
Below is a list of supplies needed for the DIY headboard. It’s short and sweet– assuming you already have a saw! If not, maybe ask a handy neighbor…
- 1 sheet of 1/2″ plywood
- Circular saw (for straight cuts)
- Jigsaw (good for rounded corners, wavy lines, etc.)
- Sandpaper
- Paint brush
- Primer
- Paint
- Command Strips
- Block of wood to use as a spacer (we used 1″)
How To Make A Colorful Headboard
Step 1: Design Your Headboard
The first step is to decide on the size and shape of your headboard.
We opted for rectangles of various sizes, though you could get even more creative with it if you’re up for it. This is especially true if you have a jigsaw because it would allow you to cut curved and wavy lines. You could do something similar to our wavy tv frame.
If you’re looking for a starting point, here are the dimensions we used for a queen-size bed. Our final headboard is 60″ wide by 24.5″ tall at its highest point. The height can be easily adjusted to fit your space—ours was limited by a sloped ceiling!

All measurements are listed as width x height:
- Piece 1 (top left): 16″ x 13.25″
- Piece 2 (top middle): 27″ x 6″
- Piece 3 (top right): 15″ x 18″
- Piece 4 (small middle): 10″ x 6.25″
- Piece 5 (large middle): 16″ x 17.5″
- Piece 6 (bottom left): 27″ x 10.25″
- Piece 7 (bottom right): 15″ x 5.5″
Step 2: Make Your Cuts
Once you have your design mapped out, it’s time to cut! Measure twice (!) and use your circular saw to make the cuts.
Step 3: Smooth and Refine Your Shapes
After your pieces are cut, you’ll want to sand all the edges and surfaces to get them nice and smooth.
If you want to add some extra flair, you can also round the corners of your pieces. We simply used a bowl to trace a rounded edge and then cut it with our jigsaw before sanding.
Step 4: Prime and Paint
Now for the fun part: color! First, apply a coat of primer to all visible sides of each piece of plywood. This will help the paint adhere better and give you a smooth, even finish.
Once the primer is dry, you can paint your pieces any color(s) you want. We applied two coats to make sure the color was rich and even.
Here’s a tip…
Use Farrow & Ball paint for this! Their small $8 sample pots are more than enough to cover a few squares for the headboard project.
Just double-check that the colors you choose are available in the sample size, as they occasionally archive certain colors and only sell them in larger cans.
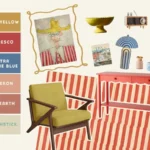
The Colors We Used…
If you need some inspiration, these are the colors we used for our son’s headboard!


Step 5: Hang Your Headboard
Once the paint is completely dry, you’re ready to hang your headboard!
We used Command Picture Hanging Strips for a clean, damage-free installation. For each piece, we placed one strip in each corner to ensure it was extra secure.
To make sure the spacing between each piece was uniform, we used a 1-inch spacer (any piece of scrap wood of whichever width you want to space the board will work!) as we hung each piece. This small step makes a big difference in the final look.
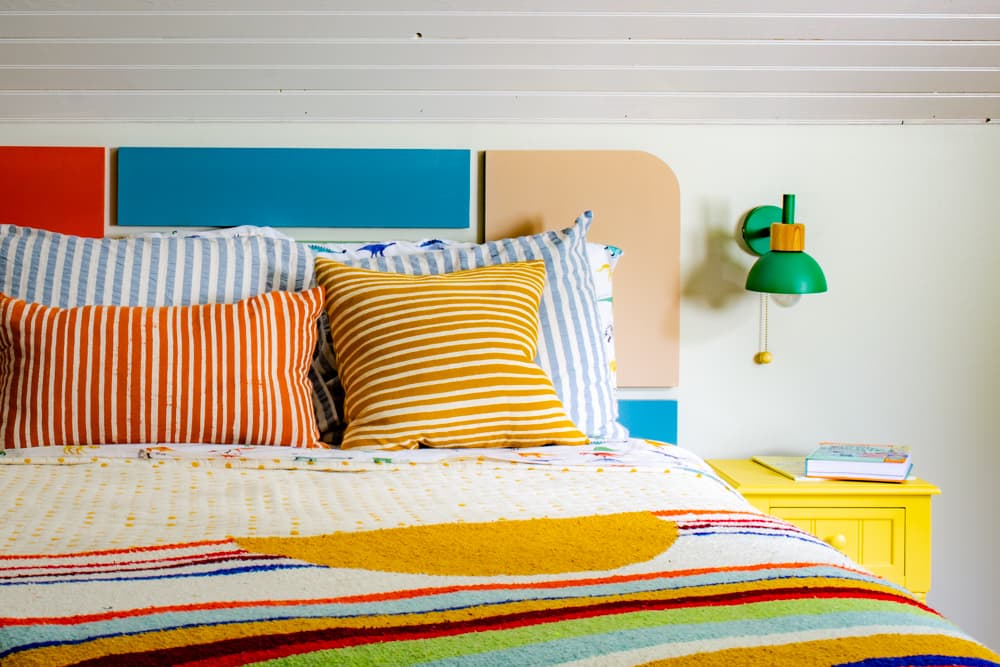
And there you have it—a custom, one-of-a-kind headboard that’s sure to be a statement piece in your bedroom.
If you need a bed frame, we used this queen sized one and painted it Stone Blue.