This guide will show you how to paint a freehand checkerboard pattern that looks effortlessly cool and hand-drawn.
The best part? It doesn’t use tape! By skipping the tape, you can create a look that’s not quite perfect—and that’s the point!
We’ll walk you through the simple steps of measuring your wall, mapping out your design, and painting your squares to get a perfect, freehand finish.
Supplies You’ll Need
- Tape measure
- Laser level (super helpful!)
- Pencil
- Paint brushes
- Paint
freehand checkerboard wall tutorial
Step 1: measure & plan
While a freehand wall may seem haphazard, getting it right requires a bit of planning. The first step is to figure out your square size and placement. Here are a few ideas for how to do that:
Measure Your Wall
Start by measuring the full width and height of your wall. This will help you decide on the size of your squares.
For example, our wall was about 171 inches wide, which perfectly broke into 19 columns of 9-inch squares. While you can choose a smaller square size, remember that it means more painting and measuring.
If your wall doesn’t divide evenly, don’t worry—this freehand style is very forgiving! You can simply make a column on either side a bit shorter to make it work.
Measure Your Doorway
If your wall has a doorway, you’ll want to consider that when choosing your square size. We were already planning to use something close to 9-inch squares, and the door size further confirmed this. Our standard 36-inch doorway divided perfectly into four 9-inch squares.
We decided to start our design above the doorway, which helped ensure the squares on either side of the door aligned perfectly. We then grew the design from there, with each side of the door having a full column of squares that continued onto the walls on either side.
You’ll see in the image below how we started off the design by breaking the area above the doorway into four squares. We then continued this pattern across the wall.
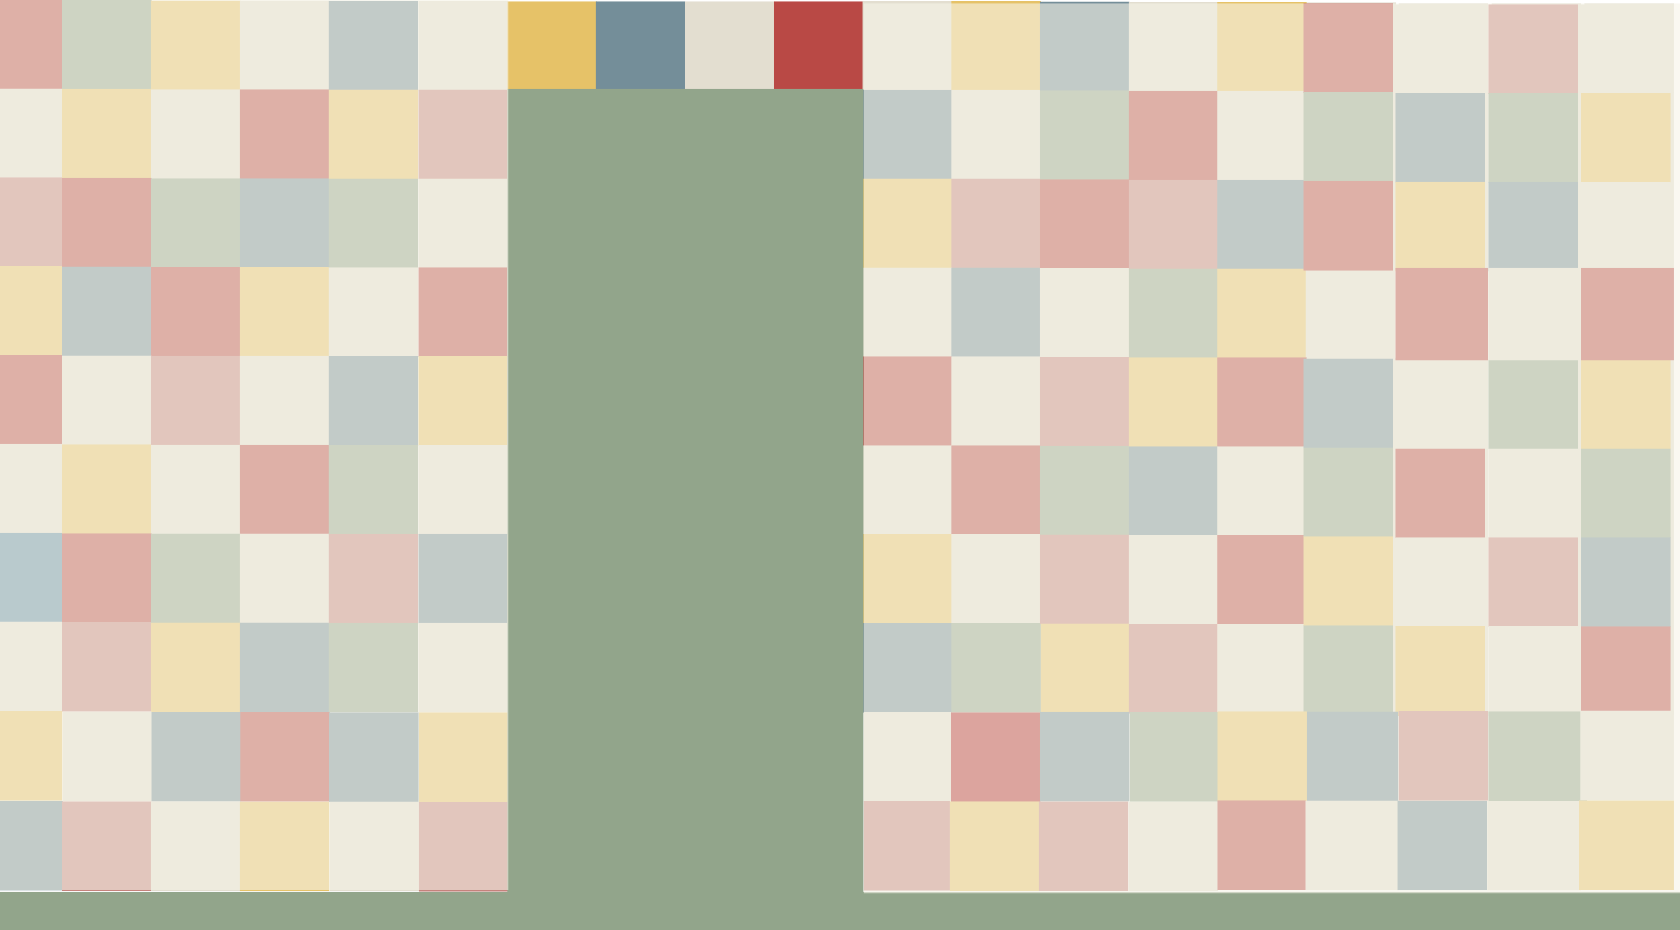
Another thing to consider is the height of your wall. If it doesn’t divide evenly, you may need to make the top or bottom row a bit shorter. Planning this ahead of time helps you decide where to place the shorter squares.
Step 2: plan your color scheme
Now for the colors! We used five colors plus the original white wall color. You could also use as few as two colors, but if you do, we recommend painting every other square to create a classic checkerboard pattern instead of a random look.
The more the merrier as far as I’m concerned, though!
Below are the colors we used– we purchased them in the Dead Flat finish because all of the colors were available in a small size can in that finish.
Step 3: map it out
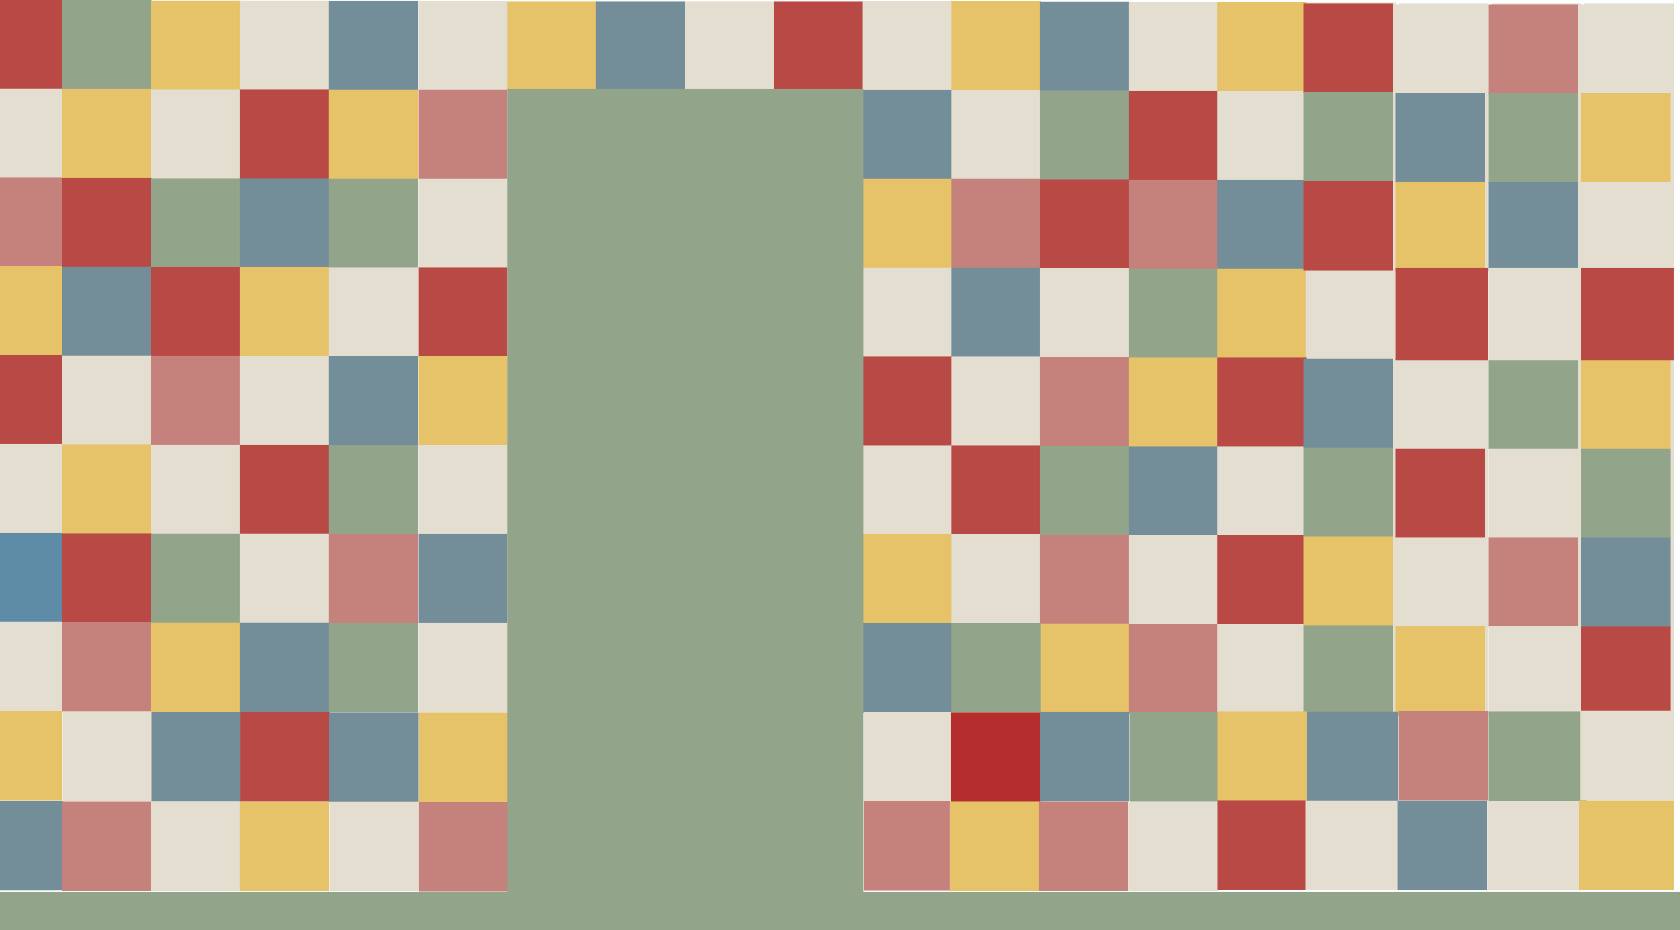
As I mentioned in Step 1, we started our design above the doorway and branched out from there. I wanted to make sure our color placement looked random, so I mapped it all out before we started painting.
I used Canva to map out our square colors, but you could also just use a simple sketch to keep things easy. And of course, you can alway just wing it and decide as you go!
A Note On Patterns
We chose a random color scheme instead of a repeating pattern. While a classic checkerboard often uses white in every other square, we loved the perfectly imperfect look of a more randomized design. Some of our rows have no white squares at all, while others have white in every other square.
Step 4: Mark Your Lines
Using a laser level, project your horizontal and vertical lines onto the wall. This will give you a temporary guide to work with. At the corner of each square, make a small, light mark with a pencil. This is all the guidance you’ll need. You’ll basically just connect the dots when you start painting.
While you don’t have to use a laser level, it will definitely help you keep your lines straight and even. If you’re not using one, you can use a ruler and pencil to mark off your measurements. At the corner of each square, make a small, light mark with a pencil. This is all the guidance you’ll need.
Step 5: time to paint
It’s time to start painting your squares!
To keep track of everything, I found it helpful to dab a small splotch of each color in its designated square first. This gave me a quick visual to make sure the colors were evenly distributed.
Once I had a splotch of every color in place, I went back and painted each square in, one color at a time.
The beauty of this freehand method is that small imperfections add to the unique, hand-drawn look. So, my advice is to not let the idea of painting a freehand wall stress you out. While it may seem intimidating at first, this is a very forgiving project!
If you accidentally paint too far outside the lines or go over into another square, you can simply paint over it with the correct color later. Remember, the goal is a perfectly imperfect, hand-drawn look. You’ve got this!

Don’t forget your light switch & outlet covers! We used paintable covers to carry the checkerboard pattern across the whole wall.
You May Also Be INterested IN…
Easy & Colorful DIY Headboard Project
