This article shares step-by-step instructions for how to build a wavy frame for a Samsung Frame TV.
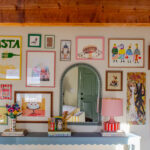
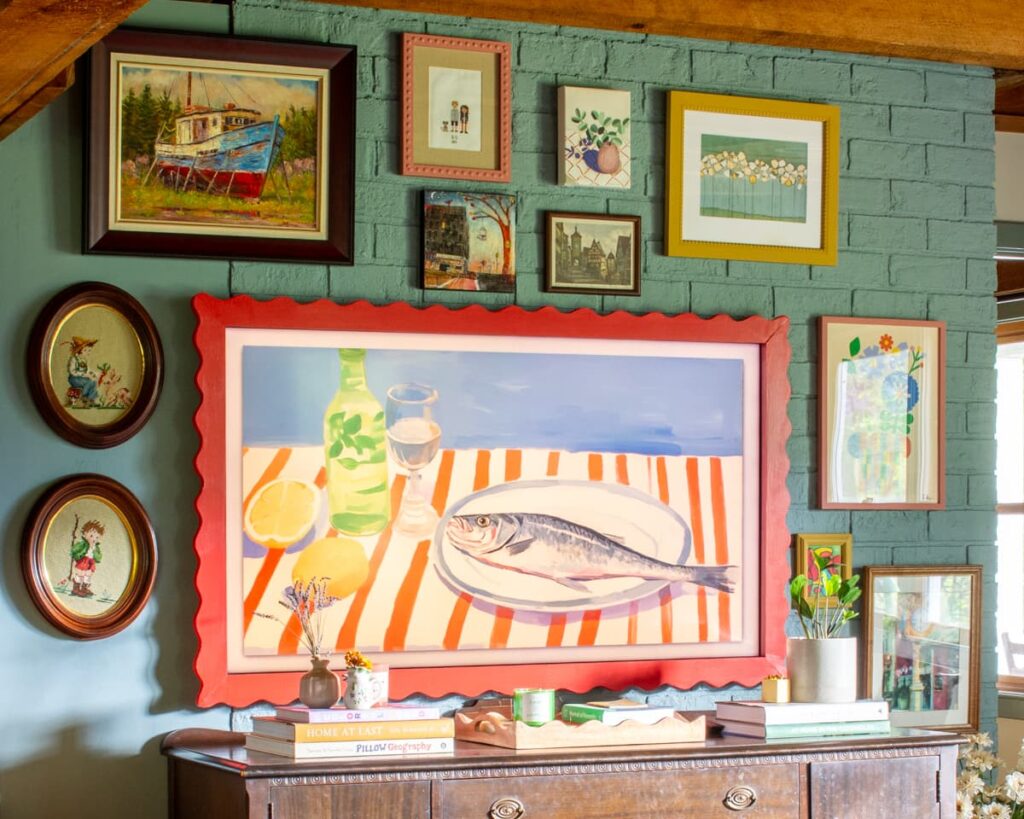
You might have recently seen our Instagram post featuring the wavy frame Alex crafted for a Samsung Frame TV. We had such a positive response, and even though it’s a pretty unique project, we wanted to share the full instructions here!
Now, I personally feel like it’s a bit complicated. I definitely wouldn’t file under an easy DIY category. BUT! If you are comfortable with power tools (or someone you know!) then it should be pretty straightforward.
We’ll start with a list of materials and tools needed and then detail how to build the various parts.
One quick (slightly annoying!) note: the frame may partially block the placement of your television’s infrared sensor. This reduces your remote control’s effectiveness. If you find your traditional remote isn’t working as well, consider using a smartphone app (like the SmartThings app for Samsung TVs) to control your TV.
Materials You’ll Need
- (2) 1×4 clear pine or poplar
- (2) 1×2 clear pine or poplar
- 1 ½” trim nails
- 1 ¼” pocket hole screws
- Sandpaper (various grits)
- Primer
- Paint
Tools You’ll Need
- Miter saw or hand saw with miter box
- Jigsaw
- Table saw
- Pocket hole jig
Step-by-Step Guide
Build the Face Frame
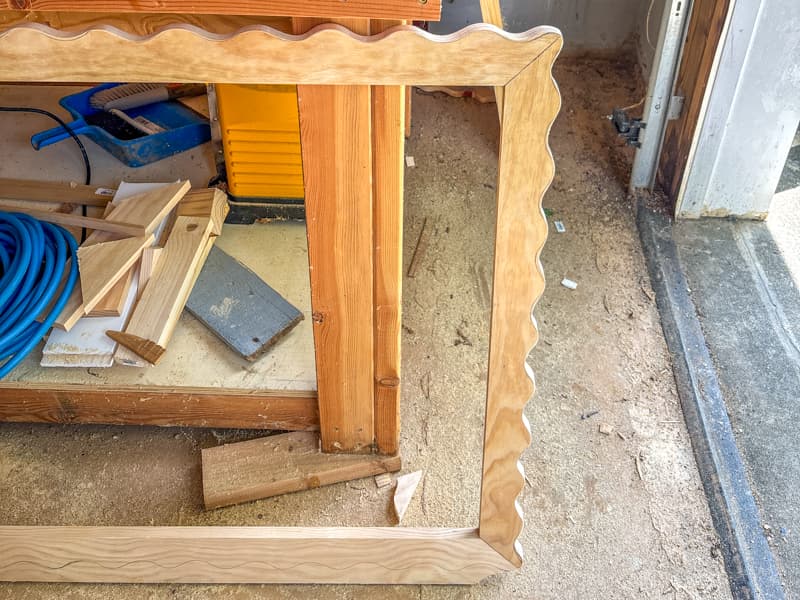
The face frame is the decorative front of your TV frame. This is where you can get creative with a unique border pattern!
- Measure your TV screen. Measure the vertical and horizontal dimensions of your TV screen, specifically the inside of the TV’s frame. This will be the short side of your trapezoid-shaped boards.
- Cut your 1x4s. Using your miter saw (or hand saw with a miter box), cut 45° miter cuts into the 1×4 boards. You’ll create four trapezoid-shaped pieces, with the short side matching the dimensions you just measured. You’ll need two pieces for each dimension (two vertical, two horizontal).
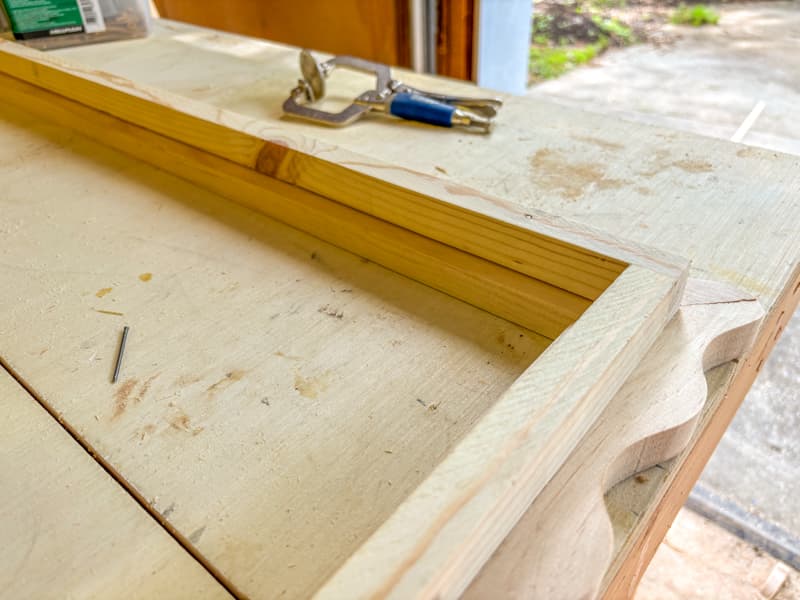
- Drill pocket holes. On the back of each end of the two vertical frame pieces, drill two pocket holes.
- Assemble the face frame. Screw the mitered corners together using your pocket hole screws to create a secure, flush frame.
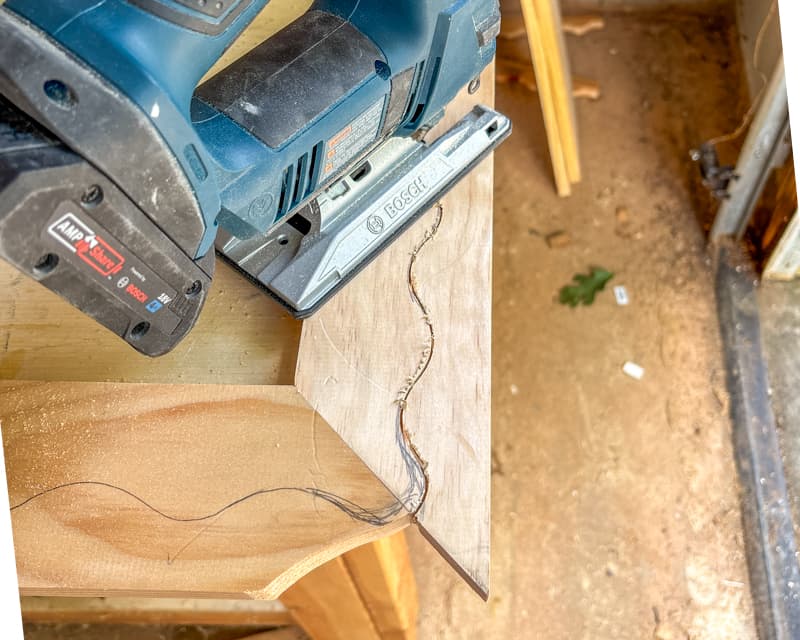
- Add your design. Now for the fun part! Draw or trace a border pattern onto the outside edge of the frame. This could be anything from a simple bevel to an intricate wave design.
- Cut the pattern. Carefully cut along your drawn line with a jigsaw. Take your time to ensure clean cuts.
- Sand. Sand any rough edges along the frame to prepare it for finishing.
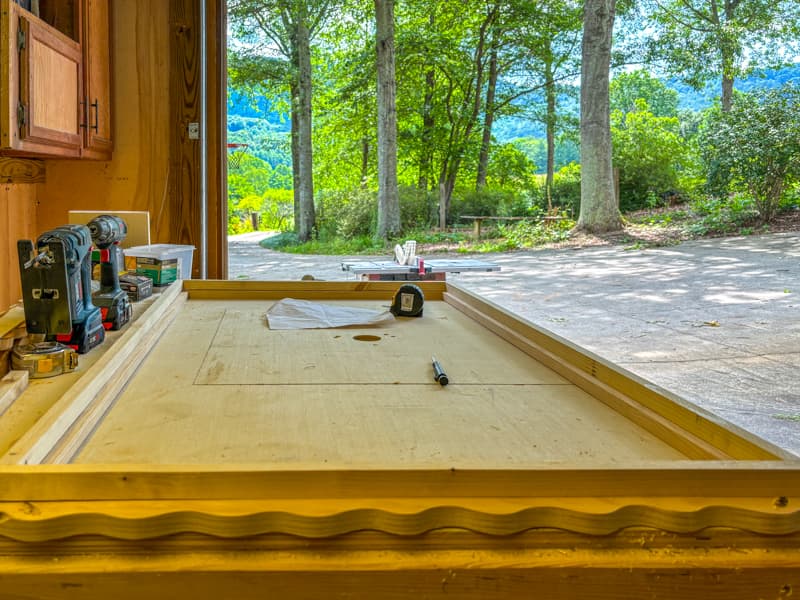
Build the Backer Frame
The backer frame is what will hold your TV frame securely onto your television.
- Measure TV depth. Measure the depth of your TV from front to back.
- Rip the 1×2 boards. Using your table saw, rip the 1×2 boards to match the depth of your TV.
- Measure TV perimeter. Measure the vertical and horizontal dimensions to the outside of your TV.
- Cut and assemble the backer frame. Cut the ripped boards from the previous step to create a frame that will fit snugly around the perimeter of your TV. Nail the frame together using simple butt joints (where the end of one board meets the side of another).
- Dry fit. Before attaching it to the face frame, dry fit the backer frame around your TV to ensure it slides on with a snug fit. This is crucial for a secure installation.
Attach the Backer Frame to the Face Frame
Now, let’s bring the two components together.
- Position the face frame. Lay the face frame face down on a solid, flat surface.
- Center the backer frame. Place the backer frame on the back of the face frame. Carefully center it so that there’s an even reveal (the amount the backer frame shows around the edges) on all four sides.
- Nail in place. Using your trim nails, nail the backer frame into the back of the face frame. Make sure your nails are short enough that they won’t penetrate through the front of the face frame.
Finish the Frame
- Final sanding. Sand any remaining rough edges of the entire frame assembly. Aim for a smooth, even surface.
- Prime. Apply a coat of primer to all sides of the frame that will be visible once installed. This will help your paint adhere better and give you a more professional finish.
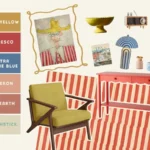
- Paint. Once the primer is dry, paint the visible surfaces of your frame with your selected paint color. You may need multiple coats for full coverage. Wondering what color we used? Romesco by Farrow & Ball
Install The Frame
Simply slide it on! To install your new custom TV frame, simply push the backer frame over your TV. It should fit snugly and, if measured correctly, won’t require any additional mounting hardware.